Boats
Boats are used for area travel between all the various island locations. Traveling with boats levels them. There are Farovian and Roperian boats. Shuttling between Farovia and Roperia do not use boats so they are not leveled by shuttling. You can view your boat, as well as all your crew members boats, moving on the ingame Animated Map. You can move your boat around on the animated map without actually traveling as well.
Farovian Boats[edit]
Below is a list of the boats available to purchase. More information about each boat is available in the individual boat pages accessible by the link from each boat entry.
Each boat has minimum point requirements and different attributes that vary the amount of time traveling to different islands takes. Boat Speed matters because the slower the boat and the further the travel distance of the island you're trying to get to - then the longer it will take you to get there.
| Farovia Boats | Icelantica Boats | |||||
|---|---|---|---|---|---|---|
| Boat | Cost (gold) |
Min Points | Boat | Cost (in gold) |
Min Points | |
Beat up Dinghy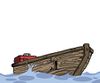
|
4,000 | 20,000 | Hybrid Cruiser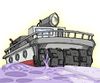
|
250,000 | 4,000,000 | |
Mini Cruiser
|
35,000 | 100,000 | Toxic Cruiser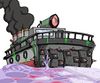
|
250,000 | 4,000,000 | |
| Geminisles + Beyond Boats | ||||||
| Boat | Cost (gold) |
Min Points | Boat | Cost (in gold) |
Min Points | |
Alcatraz Cruiser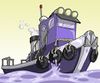
|
150,000 | 1,400,000 | Lost Perahu
|
10,000 | N/A | |
Makeshift Dinghy 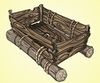
|
0 | 4,000,000 | Bass Boat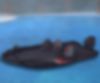
|
500 | N/A | |
| Innsmouth Island | ||||||
| Boat | Cost (gold) |
Min Points | Boat | Cost (in gold) |
Min Points | |
Lovecraft
|
100,000 | N/A | ||||
Area Traveling[edit]
The locations of Farovia have two types of boat available to purchase; the basic Beat up Dinghy and the Mini Cruiser. Icelantica offers two variations of the Cruiser; the Hybrid Cruiser for those choosing the good path and the Toxic Cruiser for those electing to follow the evil path (for a description of the two paths, see Evilness and Goodness). The locations of Geminisles has the Alcatraz Cruiser. While the Makeshift Dinghy is only available for a short time while on loan during Chapter #6 in The story of Ten Year Storm areas until Mousso recovers the Alcatraz Cruiser.
With the Beat up Dinghy, it is only possible to travel between WaterPort and Fishertonville.
The Mini Cruiser can reach all locations within Farovia and it can make the long distance to Icelantica, albeit with an extended trip time without the Rocket Booster upgrade. Note, the Mini Cruiser can only reach the Icelantica coastal location of Glacier Bay in the Mini-Cruiser. Traveling beyond the first location of Icelantica requires either the Toxic or Hybrid Cruiser to be active.
The Icelantican boats can travel to all locations. But, whilst all Cruisers share the same top speed (30mph / 26 knots), they have very different characteristics which make them highly unsuitable for certain types of travel.
- The Mini Cruiser is perfectly suited for the hops between locations within Farovia. And while a rocket booster enhanced cruiser can reach Glacier Bay in a reasonable timeframe, it will consume a lot of the expensive Rocket Fuel in order to make the trip.
- The Hybrid/Toxic Cruisers, on the other hand, are designed more for the long distance run to the icy shores of Icelantica - they have a very slow rate of acceleration and they are purposely built to be able to plough through any ice fields. As such, a level 0 boat can make the long distance trip in under 30 mins (i.e. a Fish NOW and a skip) with a zero cost outlay (as these boats do not consume any fuel). As these boats increase in levels, this trip can soon be achieved in less than 15 minutes. But their slow acceleration rate means they are ill-equipped to be used within Farovia as these distances are not long enough to reach top speed and as such trips between those locations can take up to 30 minutes regardless of the distance (i.e. even on the very short hop between Blue Crescent and Magma Reef).
Note, travel between locations within Icelantica is actually completed using the Snow Shoes and not the respective cruiser, but for the purposes of boat leveling and travel restrictions, the game treats the Icelantica cruiser as the mode of transport for any such trips.
The Alcatraz Cruiser, in combination with its specially equipped pole, was released for the new Geminisles levels and was originally purchasable at the Sans Culpra Boat Shop. With a speed of 30 knots (34.5mph) which makes it the new fastest boat. However, its upgrade Super Rocket Booster consumes the most expensive Grade AA Rocket Fuel released to date.
The recommended strategy is therefore to use either:
- Least expensive while using the upgraded rocket boosters, is to use the Mini Cruiser while traveling for any trips between the locations of Farovia and remembering to switch to a different boat upon arrival since fishing consumes fuel;
- Otherwise, is to use the faster Alcatraz Cruiser for any trips between the locations of Farovia;
But to always use the Hybrid or Toxic Cruisers for the long haul to Icelantica.
Roperia Boats[edit]
| Roperia Boats | Roperia Boats | |||||
|---|---|---|---|---|---|---|
| Boat | Cost (in silver) | Requirement | Boat | Cost (in silver) | Requirement | |
Pallet Raft
|
10,000 | Art of Mysticism | Folsom Cruiser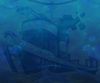
|
15,000 | Basic Marksmanship | |
Cabin Cruiser
|
100,000 | Intro to Reef Cleaning | Blubber Burner
|
1,000 | N/A see The story of Asteroid Belt | |
Hoverin Craft
|
100,000 | Clockwise Navigation | Medieval Bobber File:16-med-bobber-hidden.jpg |
99,000 | N/A see The story of Medievalton | |
Gondola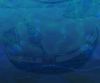
|
N/A see The story of La Terranea |
N/A | ||||
Boat Damage[edit]
The fish at Blue Crescent are known to cause damage to your boat while fishing there. It is suspected, although unconfirmed, that low level boats are more susceptible to damage while high level boats are more resilient (although not invincible) when fishing there.
When a boat is damaged, it needs to be taken to the Blue Crescent repair shop where one of the underpaid deckhands will repair the damaged boat for a fee. The damaged boat must be the currently activated boat in order for it to be repaired.
The costs of the repair differs per boat and can be seen below.
| Beat up Dinghy | Hull Damage; 1,872 gold |
| Mini Cruiser | Hull Damage; 4,093 gold, Damaged Prop; 4,775 gold, Dead Battery; 4,519 gold, Broken Piston; 5,737 gold |
| Hybrid/Toxic Cruiser | TBD |
| Bass Boat | 5,000 to 20,000 gold; see the Bass Boat for more details |
As an added bonus, after repairing a pole or boat, you'll receive 20%* of the repair cost in points.
(*Subject to change without notice)
For example: A repair that costs 10,000 gold will reward 2,000 points.
However, the damage has to be non-accidental - A broken piston from running out of Fuel and damaging the Beat up Dinghy in Blue Crescent are damages that are not rewarded experience points.
Repairing a boat may also increase its boat level, even above its max, although this doesn't make it perform any better above max.
Boat Leveling[edit]
Traveling between islands increases your expertise at navigating the Farovian and Roperian waters and this is reflected in the boat leveling meter. As your experience of traveling between islands increases, so does the amount of time saved per trip.
NOTE: boats will NOT level if the distance is too short, it needs a longer trip in order to level. Your boat will level up when you travel a distance that is 5 minutes or more away. (This is the base amount of time prior to any boat speed or any other speed boosts as shown on the first line of the trip summary).
The leveling rate starts with is
| Boat | # trips per level | % increase |
| Dinghy | 8 | 12.5 |
| Mini-Cruiser | 12 | 8.33 |
| Alcatraz Cruiser | 30 | 3.33 |
| Hybrid Cruiser | 4 | 25 |
| Toxic Cruiser | 4 | 25 |
| Makeshift Dingy | 10 | 10 |
| Lost Perahu | 30 | 3.33 |
| Bass Boat | 127 | 0.787 |
| Lovecraft | 127 | 0.787 |
| Boat | # trips per level | % increase |
| Pallet Raft | 10 | 10.00 |
| Cabin Cruiser | 14 | 7.14 |
| Folsom Cruiser | 10 | 10.00 |
| Hoverin Craft | 30 | 3.33 |
| Gondola | 50 | 2 |
| Blubber Burner | 40 | 2.5 |
| Medieval Bobber | 35 | 2.857 |
Boats are NOT leveled during fishing. Boat leveling is associated with traveling between islands, not with usage.
The leveling rate now increases more the longer the distance and trip takes. The leveling amount added is dependent on how slow the boat levels. The boat now gets when the trip is:
- 5-10 minutes: +1
- 11-20 minutes: +2
- 21-30 minutes: +3
- ...
- 51-60 minutes: +6
- ...
- No max.
The leveling rate is consistent regardless of the distance traveled per trip. Thus, a trip between Waterport and Fishertonville gives the same leveling increase as the trip between Sans Culpra and Glacier Bay. The exception to this rule is the short distance between Magma Reef and Blue Crescent, which does NOT level the Mini-Cruiser at the same rate (user experience suggests it takes 10+ trips to register a difference).
Time saved per level[edit]
The higher the level of the boat the more time is saved on each trip.
Experience shows that the percent of travel time reduced equals the level of the boat (i.e. a level 5 boat will reduce the travel time by 5%, and a level 50 boat will reduce the travel time by 50%).
All boats leveled[edit]
When you think you have leveled all of your boats in Farovia to their max values, go to Shop -> Boats. Then hit the Refresh link where it says how many boats you have leveled.
You've maxed out x of 8 Farovian boats. Refresh?
You should then get a message in green like this one.
Congrats! You've currently maxed out all Farovian boats. You will not receive Boat Leveling Special Bonuses when opening MTB's, MTC's, or treasure chests.
You should then be good to go and won't need to do this again. But if the message is in yellow, then pay attention to what boats you still need to level. Also you must hit Refresh in order for the game to sync up your status; otherwise it will think you're still working on leveling your boat and it will continue to give you Boat Leveling bonuses.[1]
The Makeshift Dinghy doesn't count towards the boats you need to max.
The same applies to Roperian boats when you are in Roperia.
Congrats! You've currently maxed out all Roperian boats. You will not receive Boat Leveling Special Bonuses when opening MTB's, MTC's, or treasure chests.
Travel Times[edit]
The ability to travel to a destination is dictated by the currently active boat. The Mini Cruiser can be used to travel to the Farovian and Parribean locations (as well as the entrance of Icelantica - Glacier Bay), whilst the Ice Breakers (Hybrid Cruiser and Toxic Cruiser) can be used to travel everywhere, including the remaining Icelantica locations and Sig's Underwater Lab.
Note that the current location does not restrict which boat you can use - it is only the destination that is governed by the boat selection.
The time it will take to travel between locations will depend on your boat, your boat level and an additional fluctuation according to weather types. This random element makes it hard to provide definitive travel times, so included below are empirical times as observed by wranglers. Followed by any boat speed boost reductions which are stacked per type of boost. All various types of boosts are not stacked together, but calculated in order to give a portion time saved amount of the previously applied time saved amount. (For example if your trip will take 10 minutes, and you have one type 2x speed boost, that will reduce your trip to 5 minutes, and another type of 2x speed boost will reduce it down to 2.5 minutes {half of the new time, not half of original time}.)
Example traveling from Deadwater Pass to Blue Crescent with level 48 Alcatraz Cruiser:
Voyaging to Blue Crescent - arriving in 16 mins 16 secs!
Minutes Details Alcatraz Cruiser +41.8 mins 20.9 nautical miles @ 30 knots Weather: +0.9 mins Unfavorable headwind Boat Level: −20 mins Lv. 48/50 (gained 3%) Super Rocket: −16 mins* 3.5x boost *Time not reduced 2x / 5x Speed boost: −7.6 mins Expires in 23 hrs 53 mins 45 secs Ad Friendly: −2 mins 1.5x Speed Boost Recent Donation: −10.1 mins* Donate to travel 5x faster *Time not reduced Traveling Bonus: −10.1 mins 5x Traveling Boost ends in 6 hrs Trolling Net: +1.5 mins Trolling! 4 mins 36 secs total
- Want to turn around back to Deadwater Pass?
- Want to turn around back to Deadwater Pass?
- NOTE: Must turn around within 2 min. of leaving.
The boat travel time is determined by the distance NM (Nautical Miles) multiplied by the fraction of an hour (in minutes) over the boat speed. In the above example this is 20.9 NM * (60 min / 30 knots).
Weather will give a random amount which appears to be +/- 3 minutes depending on if you have favorable winds or unfavorable headwind.
The higher your boat level, the more time will be saved. The gained x% (ie: 3% above) is Boat Leveling increase, it is NOT indicative of minutes saved. Please see the above section, Boat Leveling, in particular the Time saved per Level for more details (where Alcatraz shows 3.33% increase in experience).
If you equip the boats upgraded Rocket Boosters, the Rocket Booster will increases boat speed 6x and the Super Rocket Booster increases boat speed 3.5x. If they are not equipped, like in the above example, they are grayed out but show how much time would have been saved IF they had been used.
Speed Boost[edit]
A resource Speed boost of 2x Boat Speed Boost and can only be stacked with the other resource 5x Boat Speed Boost to give cumulative 7x amount together.
- 7x Speed Boost: −8.9 mins Stacked my 5x+2x boosts! 5x boost expires in 23 hrs
Ad Friendly[edit]
Ad Friendly Description[edit]
“Ad Friendly” 1.5x Speed Boost! (My Status: ELIGIBLE for 1.5x Speed Boost!)
If you aren't tracked as using an Ad Blocker on Fish Wrangler, you'll receive an additional 1.5x Speed Boost while traveling. However, if you are tracked as using an Ad Blocker, it will take you about 24 hours of not using one, to get the 1.5x Speed Boost back.
Want a 5.5x Speed Boost? If you've already donated within last 30 days & want to get an additional 1.5x boost, select “Always Display Ads” under the Settings Page and you'll be set!
TIP: To be Ad Friendly, go to fishwrangler.com, click on your AdBlocker, then click "Disable ads on fishwrangler.com". This will add an exception and make you complaint when playing via Facebook or fishwrangler.com.
Recent Donation[edit]
If you have recently made purchases over $10, including buying Red Love Chum, you will receive a 5x speed boost. For purchases less than $10 it will speed up your traveling by 2x. Otherwise, this is grayed out and shows how much time could have been saved. As stated above by enabling showing ads, even though one benefits of purchase is ad-free, this can be increased to 5.5x. To make purchases in-game https://fishwrangler.com/purchase
Traveling Bonus[edit]
A Special Bonus Traveling boat speed boost, which can be stacked with other Special Bonuses, can stack 2 or more 5x-20x Traveling boosts together.
Trolling Net[edit]
If your Trolling Net is ON your travel time is reduced by 10%. In the above example the total 4.5 minutes travel time less 1.5 minute increase would have been 3 minutes IF this resource had been turned off.
Farovian Travel Times[edit]
Note: Travel times in the game were recently updated and these new times have not yet been reflected in the values provided here. Until these tables have been updated, please be aware that the actual time experienced may well differ from the times as stated here.
Farovian Travel Times with Rocket Booster and Level 50 Mini Cruiser[edit]
In the table below is an average set of travel times with a level 50 Mini Cruiser and the Rocket Booster from all locations to the limited subset accessible by the Mini Cruiser (predominantly Farovia and Parribea). The actual duration may vary according to weather types, but this should provide a typical travel time. All times are in minutes.
| To | WaterPort | Fishertonville | Blue Crescent | Magma Reef | Sans Culpra | Glacier Bay | Devils Cove | Deadwater Pass | Krakken Rocks | ||||||||||||||||||
| From | Travel Time |
Rocket Saved |
Lvl 50 Saved |
Travel Time |
Rocket Saved |
Lvl 50 Saved |
Travel Time |
Rocket Saved |
Lvl 50 Saved |
Travel Time |
Rocket Saved |
Lvl 50 Saved |
Travel Time |
Rocket Saved |
Lvl 50 Saved |
Travel Time |
Rocket Saved |
Lvl 50 Saved |
Travel Time |
Rocket Saved |
Lvl 50 Saved |
Travel Time |
Rocket Saved |
Lvl 50 Saved |
Travel Time |
Rocket Saved |
Lvl 50 Saved |
| WaterPort | - | - | - | 2 | 5 | 5 | 4 | 15 | 17 | 4 | 16 | 19 | 4 | 16 | 18 | ||||||||||||
| Fishertonville | 2 | 5 | 5 | - | - | - | 4 | 15 | 17 | 3 | 12 | 14 | 3 | 12 | 13 | ||||||||||||
| Blue Crescent | 3 | 12 | 13 | 3 | 14 | 15 | - | - | - | 1.17 | 0 | 0 | 1 | 3 | 3 | ||||||||||||
| Magma Reef | 4 | 17 | 19 | 3 | 12 | 14 | 1.17 | 0 | 0 | - | - | - | 1 | 4 | 4 | ||||||||||||
| Sans Culpra | 4 | 17 | 20 | 3 | 13 | 15 | 1 | 4 | 4 | 1 | 4 | 4 | - | - | - | 15 | 78 | 91 | |||||||||
| Glacier Bay | - | - | - | ||||||||||||||||||||||||
| San Digloo | |||||||||||||||||||||||||||
| Lake Freezberg | |||||||||||||||||||||||||||
| Snowpeak River | |||||||||||||||||||||||||||
| Snowpeak Summit | |||||||||||||||||||||||||||
| Sigs Lair | |||||||||||||||||||||||||||
| Sigs Vault | |||||||||||||||||||||||||||
| Sigs Wasteland | |||||||||||||||||||||||||||
| Devils Cove | - | - | - | ||||||||||||||||||||||||
| Deadwater Pass | - | - | - | ||||||||||||||||||||||||
| Krakken Rocks | - | - | - | ||||||||||||||||||||||||
Farovian Travel Times with Level 50 Hybrid/Toxic Cruiser[edit]
In the table below is the range of travel times between all locations in a level 50 Ice Breaker (Hybrid Cruiser/Toxic Cruiser) as observed by wranglers. The lower and upper bounds will be dictated by the weather. Most travel times should be within these ranges.
| To | WP | FV | BC | MR | SC | GB | SD | LF | SR | SS | SL | SV | SW | DC | DP | KR |
| From | ||||||||||||||||
| WaterPort | - | 18.53 - 19.23 | 17.03 - 18.53 | 18.02 - 18.57 | 17.57 - 18.67 | 29.93 - 30.63 | 29.03 - 31.43 | 29.48 - 32.05 | 30.13 - 30.53 | 36.02 - 37.17 | 23.65 - 24.65 | 16.57 - 16.88 | 16.40 - 18.25 | |||
| Fishertonville | 17.87 - 18.90 | - | 14.88 - 18.05 | 16.35 - 17.23 | 16.27 - 17.57 | 23.78 - 26.98 | 25.62 - 26.65 | 25.02 - 26.28 | 24.43 - 25.00 | 30.50 - 31.13 | 20.77 - 20.92 | 16.03 - 18.28 | 17.38 - 17.82 | |||
| Blue Crescent | 17.07 - 18.82 | 17.07 - 18.83 | - | 16.83 - 16.97 | 17.45 - 17.67 | 13.60 - 16.98 | 14.08 - 16.48 | 14.25 - 17.02 | 14.48 - 16.07 | 21.90 - 22.68 | 9.02 - 10.05 | 17.40 - 18.02 | 17.65 - 18.72 | |||
| Magma Reef | 16.40 - 18.60 | 16.52 - 17.95 | 18.12 - 16.42 | - | 7.18 - 18.33 | 14.25 - 15.27 | 14.13 - 16.87 | 15.65 - 15.83 | 15.12 - 16.23 | 20.22 - 20.85 | 11.58 - 11.78 | 16.42 - 18.87 | 17.57 - 18.93 | |||
| Sans Culpra | 16.70 - 18.78 | 17.45 - 18.38 | 12.00 - 17.40 | 7.18 - 16.98 | - | 11.32 - 24.27 | 11.68 - 12.45 | 14.53 - 17.28 | 12.65 - 13.52 | 17.98 - 19.75 | 3.07 - 5.72 | 18.50 - 18.82 | 17.58 - 18.03 | |||
| Glacier Bay | 29.33 - 31.67 | 25.87 - 25.52 | 15.27 - 28.60 | 14.82 - 15.75 | 12.13 - 18.00 | - | 1.17 - 5.98 | 2.17 | 2.17 | 16.03 - 16.23 | 13.58 - 14.72 | 12.17 - 13.22 | 17.03 - ? | |||
| San Digloo | 29.00 - 30.35 | 25.20 - 26.15 | 14.48 - 16.53 | 14.85 - 16.83 | 12.35 - 13.22 | 1.17 - 5.98 | - | 1.17 | 1.17 | 15.77 - 15.73 | 15.08 - 16.92 | 12.00 - 14.33 | 12.37 - 14.65 | |||
| Lake Freezberg | 31.02 - 31.35 | 24.47 - 26.23 | 16.80 - 17.97 | 14.62 - 16.48 | 13.40 - 16.77 | 2.17 | 1.17 | - | 1.17 | 5.80 - 7.00 | 14.30 - 15.28 | 12.45 - 14.87 | 12.73 - 13.07 | |||
| Snowpeak River | 29.13 - 31.38 | 25.77 - 26.88 | 14.05 - 15.77 | 15.58 - 16.00 | 12.27 - 14.62 | 2.17 | 1.17 | 1.17 | - | 13.33 - 16.90 | 15.65 - 16.42 | 12.58 - 13.83 | 12.27 - 14.82 | |||
| Snowpeak Summit | 36.02 - 37.17 | 29.52 - 27.68 | 22.28 - 22.68 | 20.22 - 20.85 | 17.98 - 19.75 | 16.03 - 16.23 | 16.22 - 15.73 | 14.75 - 16.03 | 13.55 - 13.82 | - | 7.40 - 9.40 | 7.40 - 9.12 | 7.30 - 8.45 | |||
| Sigs Lair | 24.67 - 26.40 | 19.35 - 21.47 | 8.68 - 9.70 | 10.22 - 10.72 | 3.40 - 6.98 | 16.68 - 16.87 | 15.60 - 16.78 | 15.73 - 16.33 | 16.43 - 15.47 | 7.40 - 9.40 | - | 1.17 | 2.17 | |||
| Sigs Vault | 17.92 - 18.72 | 17.00 - 18.90 | 17.95 - 18.50 | 17.17 - 18.17 | 17.35 - 18.92 | 11.62 - 12.65 | 12.05 - 12.52 | 12.62 - 14.23 | 12.35 - 13.22 | 7.40 - 9.12 | 1.17 | - | 17.45 - 18.18 | |||
| Sigs Wasteland | 16.08 - 17.13 | 16.27 - 17.92 | 16.75 - 18.88 | 16.68 - 17.32 | 16.70 - 18.03 | 12.17 - 13.57 | 12.42 - 13.82 | 12.67 - 14.13 | 13.05 - 14.27 | 7.30 - 8.45 | 2.17 | 16.10 - 18.15 | - | |||
| Devils Cove | 29.00 | - | ||||||||||||||
| Deadwater Pass | - | |||||||||||||||
| Krakken Rocks | 41.12 - 43.02 | 33.00 - 34.87 | 31.52 - 33.48 | 29.77 - 30.75 | 31.75 - 33.62 | 45.77 - 48.00 | 46.00 - 47.88 | 49.50 - 51.75 | 50.88 - 53.00 | 53.63 - 55.50 | 29.25 - 31.62 | 26.77 - 29.50 | 26.87 - 29.37 | 7.63 - 9.13 | 2.76 - 5.50 | - |
Farovian Travel Times with Super Rocket Booster and Level 50 Alcatraz Cruiser[edit]
In the table below is an average set of travel times with a level 50 Alcatraz Cruiser and the Super Rocket Booster from all locations to the limited subset accessible by the Alcatraz Cruiser (predominantly Farovia and Parribea). The actual duration may vary according to weather types, but this should provide a typical travel time. All times are in minutes.
| To | WaterPort | Fishertonville | Blue Crescent | Magma Reef | Sans Culpra | Glacier Bay | Devils Cove | Deadwater Pass | Krakken Rocks | ||||||||||||||||||
| From | Travel Time |
Rocket Saved |
Lvl 50 Saved |
Travel Time |
Rocket Saved |
Lvl 50 Saved |
Travel Time |
Rocket Saved |
Lvl 50 Saved |
Travel Time |
Rocket Saved |
Lvl 50 Saved |
Travel Time |
Rocket Saved |
Lvl 50 Saved |
Travel Time |
Rocket Saved |
Lvl 50 Saved |
Travel Time |
Rocket Saved |
Lvl 50 Saved |
Travel Time |
Rocket Saved |
Lvl 50 Saved |
Travel Time |
Rocket Saved |
Lvl 50 Saved |
| WaterPort | - | - | - | 2 | 5 | 5 | 4 | 15 | 17 | 4 | 16 | 19 | 4 | 16 | 18 | ||||||||||||
| Fishertonville | 2 | 5 | 5 | - | - | - | 4 | 15 | 17 | 3 | 12 | 14 | 3 | 12 | 13 | ||||||||||||
| Blue Crescent | 3 | 12 | 13 | 3 | 14 | 15 | - | - | - | 1.17 | 0 | 0 | 1 | 3 | 3 | ||||||||||||
| Magma Reef | 4 | 17 | 19 | 3 | 12 | 14 | 1.17 | 0 | 0 | - | - | - | 1 | 4 | 4 | ||||||||||||
| Sans Culpra | 4 | 17 | 20 | 3 | 13 | 15 | 1 | 4 | 4 | 1 | 4 | 4 | - | - | - | 15 | 78 | 91 | |||||||||
| Glacier Bay | - | - | - | ||||||||||||||||||||||||
| San Digloo | |||||||||||||||||||||||||||
| Lake Freezberg | |||||||||||||||||||||||||||
| Snowpeak River | |||||||||||||||||||||||||||
| Snowpeak Summit | |||||||||||||||||||||||||||
| Sigs Lair | |||||||||||||||||||||||||||
| Sigs Vault | |||||||||||||||||||||||||||
| Sigs Wasteland | |||||||||||||||||||||||||||
| Devils Cove | - | - | - | ||||||||||||||||||||||||
| Deadwater Pass | - | - | - | ||||||||||||||||||||||||
| Krakken Rocks | - | - | - | ||||||||||||||||||||||||
Roperian Travel Times[edit]
Roperian Travel Times with Lv X Hoverin Craft[edit]
In the table below is an average set of travel times with a level X Hoverin Craft from all locations to the limited subset accessible by the Hoverin Craft (predominantly Roperia and River areas). The actual duration may vary according to weather types, but this should provide a typical travel time. All times are in minutes.
| To | SF | NS | RC | AR | HV | PM | HP | SA | KC | MR | CE | SdS | CC | AP | DS | JJ | Cck | BB |
| From | ||||||||||||||||||
| Santa Francesca | - | 18.53 - 19.23 | 17.03 - 18.53 | 18.02 - 18.57 | 17.57 - 18.67 | 29.93 - 30.63 | 29.03 - 31.43 | 29.48 - 32.05 | 30.13 - 30.53 | 36.02 - 37.17 | 23.65 - 24.65 | 16.57 - 16.88 | 16.40 - 18.25 | |||||
| New Seinborough | 17.87 - 18.90 | - | 14.88 - 18.05 | 16.35 - 17.23 | 16.27 - 17.57 | 23.78 - 26.98 | 25.62 - 26.65 | 25.02 - 26.28 | 24.43 - 25.00 | 30.50 - 31.13 | 20.77 - 20.92 | 16.03 - 18.28 | 17.38 - 17.82 | |||||
| Redwood Crescent | 17.07 - 18.82 | 17.07 - 18.83 | - | 16.83 - 16.97 | 17.45 - 17.67 | 13.60 - 16.98 | 14.08 - 16.48 | 14.25 - 17.02 | 14.48 - 16.07 | 21.90 - 22.68 | 9.02 - 10.05 | 17.40 - 18.02 | 17.65 - 18.72 | |||||
| Asteroid Reef | 16.40 - 18.60 | 16.52 - 17.95 | 18.12 - 16.42 | - | 7.18 - 18.33 | 14.25 - 15.27 | 14.13 - 16.87 | 15.65 - 15.83 | 15.12 - 16.23 | 20.22 - 20.85 | 11.58 - 11.78 | 16.42 - 18.87 | 17.57 - 18.93 | |||||
| Helvetica | 16.70 - 18.78 | 17.45 - 18.38 | 12.00 - 17.40 | 7.18 - 16.98 | - | 11.32 - 24.27 | 11.68 - 12.45 | 14.53 - 17.28 | 12.65 - 13.52 | 17.98 - 19.75 | 3.07 - 5.72 | 18.50 - 18.82 | 17.58 - 18.03 | |||||
| Perilimeter | 29.33 - 31.67 | 25.87 - 25.52 | 15.27 - 28.60 | 14.82 - 15.75 | 12.13 - 18.00 | - | 1.17 - 5.98 | 2.17 | 2.17 | 16.03 - 16.23 | 13.58 - 14.72 | 12.17 - 13.22 | 17.03 - ? | |||||
| Hexperiment | 29.00 - 30.35 | 25.20 - 26.15 | 14.48 - 16.53 | 14.85 - 16.83 | 12.35 - 13.22 | 1.17 - 5.98 | - | 1.17 | 1.17 | 15.77 - 15.73 | 15.08 - 16.92 | 12.00 - 14.33 | 12.37 - 14.65 | |||||
| Subaqueous | 31.02 - 31.35 | 24.47 - 26.23 | 16.80 - 17.97 | 14.62 - 16.48 | 13.40 - 16.77 | 2.17 | 1.17 | - | 1.17 | 5.80 - 7.00 | 14.30 - 15.28 | 12.45 - 14.87 | 12.73 - 13.07 | |||||
| Kingsland Confluence | 29.13 - 31.38 | 25.77 - 26.88 | 14.05 - 15.77 | 15.58 - 16.00 | 12.27 - 14.62 | 2.17 | 1.17 | 1.17 | - | 13.33 - 16.90 | 15.65 - 16.42 | 12.58 - 13.83 | 12.27 - 14.82 | |||||
| Mosquito Run | 36.02 - 37.17 | 29.52 - 27.68 | 22.28 - 22.68 | 20.22 - 20.85 | 17.98 - 19.75 | 16.03 - 16.23 | 16.22 - 15.73 | 14.75 - 16.03 | 13.55 - 13.82 | - | 7.40 - 9.40 | 7.40 - 9.12 | 7.30 - 8.45 | |||||
| Cadaver Expanse | 24.67 - 26.40 | 19.35 - 21.47 | 8.68 - 9.70 | 10.22 - 10.72 | 3.40 - 6.98 | 16.68 - 16.87 | 15.60 - 16.78 | 15.73 - 16.33 | 16.43 - 15.47 | 7.40 - 9.40 | - | 1.17 | 2.17 | |||||
| Sepulcro del Sol | 17.92 - 18.72 | 17.00 - 18.90 | 17.95 - 18.50 | 17.17 - 18.17 | 17.35 - 18.92 | 11.62 - 12.65 | 12.05 - 12.52 | 12.62 - 14.23 | 12.35 - 13.22 | 7.40 - 9.12 | 1.17 | - | 17.45 - 18.18 | |||||
| Coral Corral | 16.08 - 17.13 | 16.27 - 17.92 | 16.75 - 18.88 | 16.68 - 17.32 | 16.70 - 18.03 | 12.17 - 13.57 | 12.42 - 13.82 | 12.67 - 14.13 | 13.05 - 14.27 | 7.30 - 8.45 | 2.17 | 16.10 - 18.15 | - | |||||
| Amadahy Plains | 29.00 | - | ||||||||||||||||
| Deadwater Saloon | - | |||||||||||||||||
| Jettison Jetty | - | |||||||||||||||||
| Castout Creek | 41.12 - 43.02 | 33.00 - 34.87 | 31.52 - 33.48 | 29.77 - 30.75 | 31.75 - 33.62 | 45.77 - 48.00 | 46.00 - 47.88 | 49.50 - 51.75 | 50.88 - 53.00 | 53.63 - 55.50 | 29.25 - 31.62 | 26.77 - 29.50 | 26.87 - 29.37 | 7.63 - 9.13 | 2.76 - 5.50 | - | ||
| Burnout Bay | 41.12 - 43.02 | 33.00 - 34.87 | 31.52 - 33.48 | 29.77 - 30.75 | 31.75 - 33.62 | 45.77 - 48.00 | 46.00 - 47.88 | 49.50 - 51.75 | 50.88 - 53.00 | 53.63 - 55.50 | 29.25 - 31.62 | 26.77 - 29.50 | 26.87 - 29.37 | 7.63 - 9.13 | 2.76 - 5.50 | - |
Roperian Travel Times with Lv 50 Folsom[edit]
In the table below is an average set of travel times with a level X Folsom Cruiser from all locations to the limited subset accessible by the Folsom Cruiser (predominantly Roperia and River areas). The actual duration may vary according to weather types, but this should provide a typical travel time. All times are in minutes.
| To | Santa Francesca | New Seinborough | Redwood Crescent | Asteroid Reef | Helvetica | Perilimeter | Hexperiment | Subaqueous | Kingsland Confluence | Mosquito Run | Cadaver Expanse | Sepulcro del Sol | Coral Corral | Amadahy Plains | Deadwater Saloon | Jettison Jetty | Castout Creek | Burnout Bay | ||||||||||||||||||||||||||||||||||||
| From | Travel Time |
Rocket Saved |
Lvl 50 Saved |
Travel Time |
Rocket Saved |
Lvl 50 Saved |
Travel Time |
Rocket Saved |
Lvl 50 Saved |
Travel Time |
Rocket Saved |
Lvl 50 Saved |
Travel Time |
Rocket Saved |
Lvl 50 Saved |
Travel Time |
Rocket Saved |
Lvl 50 Saved |
Travel Time |
Rocket Saved |
Lvl 50 Saved |
Travel Time |
Rocket Saved |
Lvl 50 Saved |
Travel Time |
Rocket Saved |
Lvl 50 Saved | |||||||||||||||||||||||||||
| Santa Francesca | - | - | - | 2 | 5 | 5 | 4 | 15 | 17 | 4 | 16 | 19 | 4 | 16 | 18 | |||||||||||||||||||||||||||||||||||||||
| New Seinborough | 2 | 5 | 5 | - | - | - | 4 | 15 | 17 | 3 | 12 | 14 | 3 | 12 | 13 | |||||||||||||||||||||||||||||||||||||||
| Redwood Crescent | 3 | 12 | 13 | 3 | 14 | 15 | - | - | - | 1.17 | 0 | 0 | 1 | 3 | 3 | |||||||||||||||||||||||||||||||||||||||
| Asteroid Reef | 4 | 17 | 19 | 3 | 12 | 14 | 1.17 | 0 | 0 | - | - | - | 1 | 4 | 4 | |||||||||||||||||||||||||||||||||||||||
| Helvetica | 4 | 17 | 20 | 3 | 13 | 15 | 1 | 4 | 4 | 1 | 4 | 4 | - | - | - | 15 | 78 | 91 | ||||||||||||||||||||||||||||||||||||
| Perilimeter | - | - | - | |||||||||||||||||||||||||||||||||||||||||||||||||||
| Hexperiment | ||||||||||||||||||||||||||||||||||||||||||||||||||||||
| Subaqueous | ||||||||||||||||||||||||||||||||||||||||||||||||||||||
| Kingsland Confluence | ||||||||||||||||||||||||||||||||||||||||||||||||||||||
| Mosquito Run | ||||||||||||||||||||||||||||||||||||||||||||||||||||||
| Cadaver Expanse | ||||||||||||||||||||||||||||||||||||||||||||||||||||||
| Sepulcro del Sol | ||||||||||||||||||||||||||||||||||||||||||||||||||||||
| Coral Corral | ||||||||||||||||||||||||||||||||||||||||||||||||||||||
| Amadahy Plains | - | - | - | |||||||||||||||||||||||||||||||||||||||||||||||||||
| Deadwater Saloon | - | - | - | |||||||||||||||||||||||||||||||||||||||||||||||||||
| Jettison Jetty | - | - | - | |||||||||||||||||||||||||||||||||||||||||||||||||||
| Castout Creek | - | - | - | |||||||||||||||||||||||||||||||||||||||||||||||||||
| Burnout Bay | - | - | - | |||||||||||||||||||||||||||||||||||||||||||||||||||